Live user cursors with Phoenix Presence
February 1, 2022
13 min read·— views
Don't forget to also read the second part of this tutorial, where I implement a similar functionality using Phoenix LiveView!
For the past few months, I've been learning about Phoenix and Elixir. Since I already spent most of my time staring at a computer screen for my day job, this means reading lots of books, listening to podcasts and watching conference talks. It's been very interesting so far, but I hadn't had a chance to get my hands dirty and write some actual Elixir code.
This tutorial is my way of getting better at Phoenix, especially Phoenix Channels and Presence. What I'll be building is a simple, but compelling software feature I've seen in the design tool Figma (and other collaborative tools). In Figma, you can see the mouse cursors of others people working on the document. It's a cool feature and Phoenix was made for this stuff!
What we're building
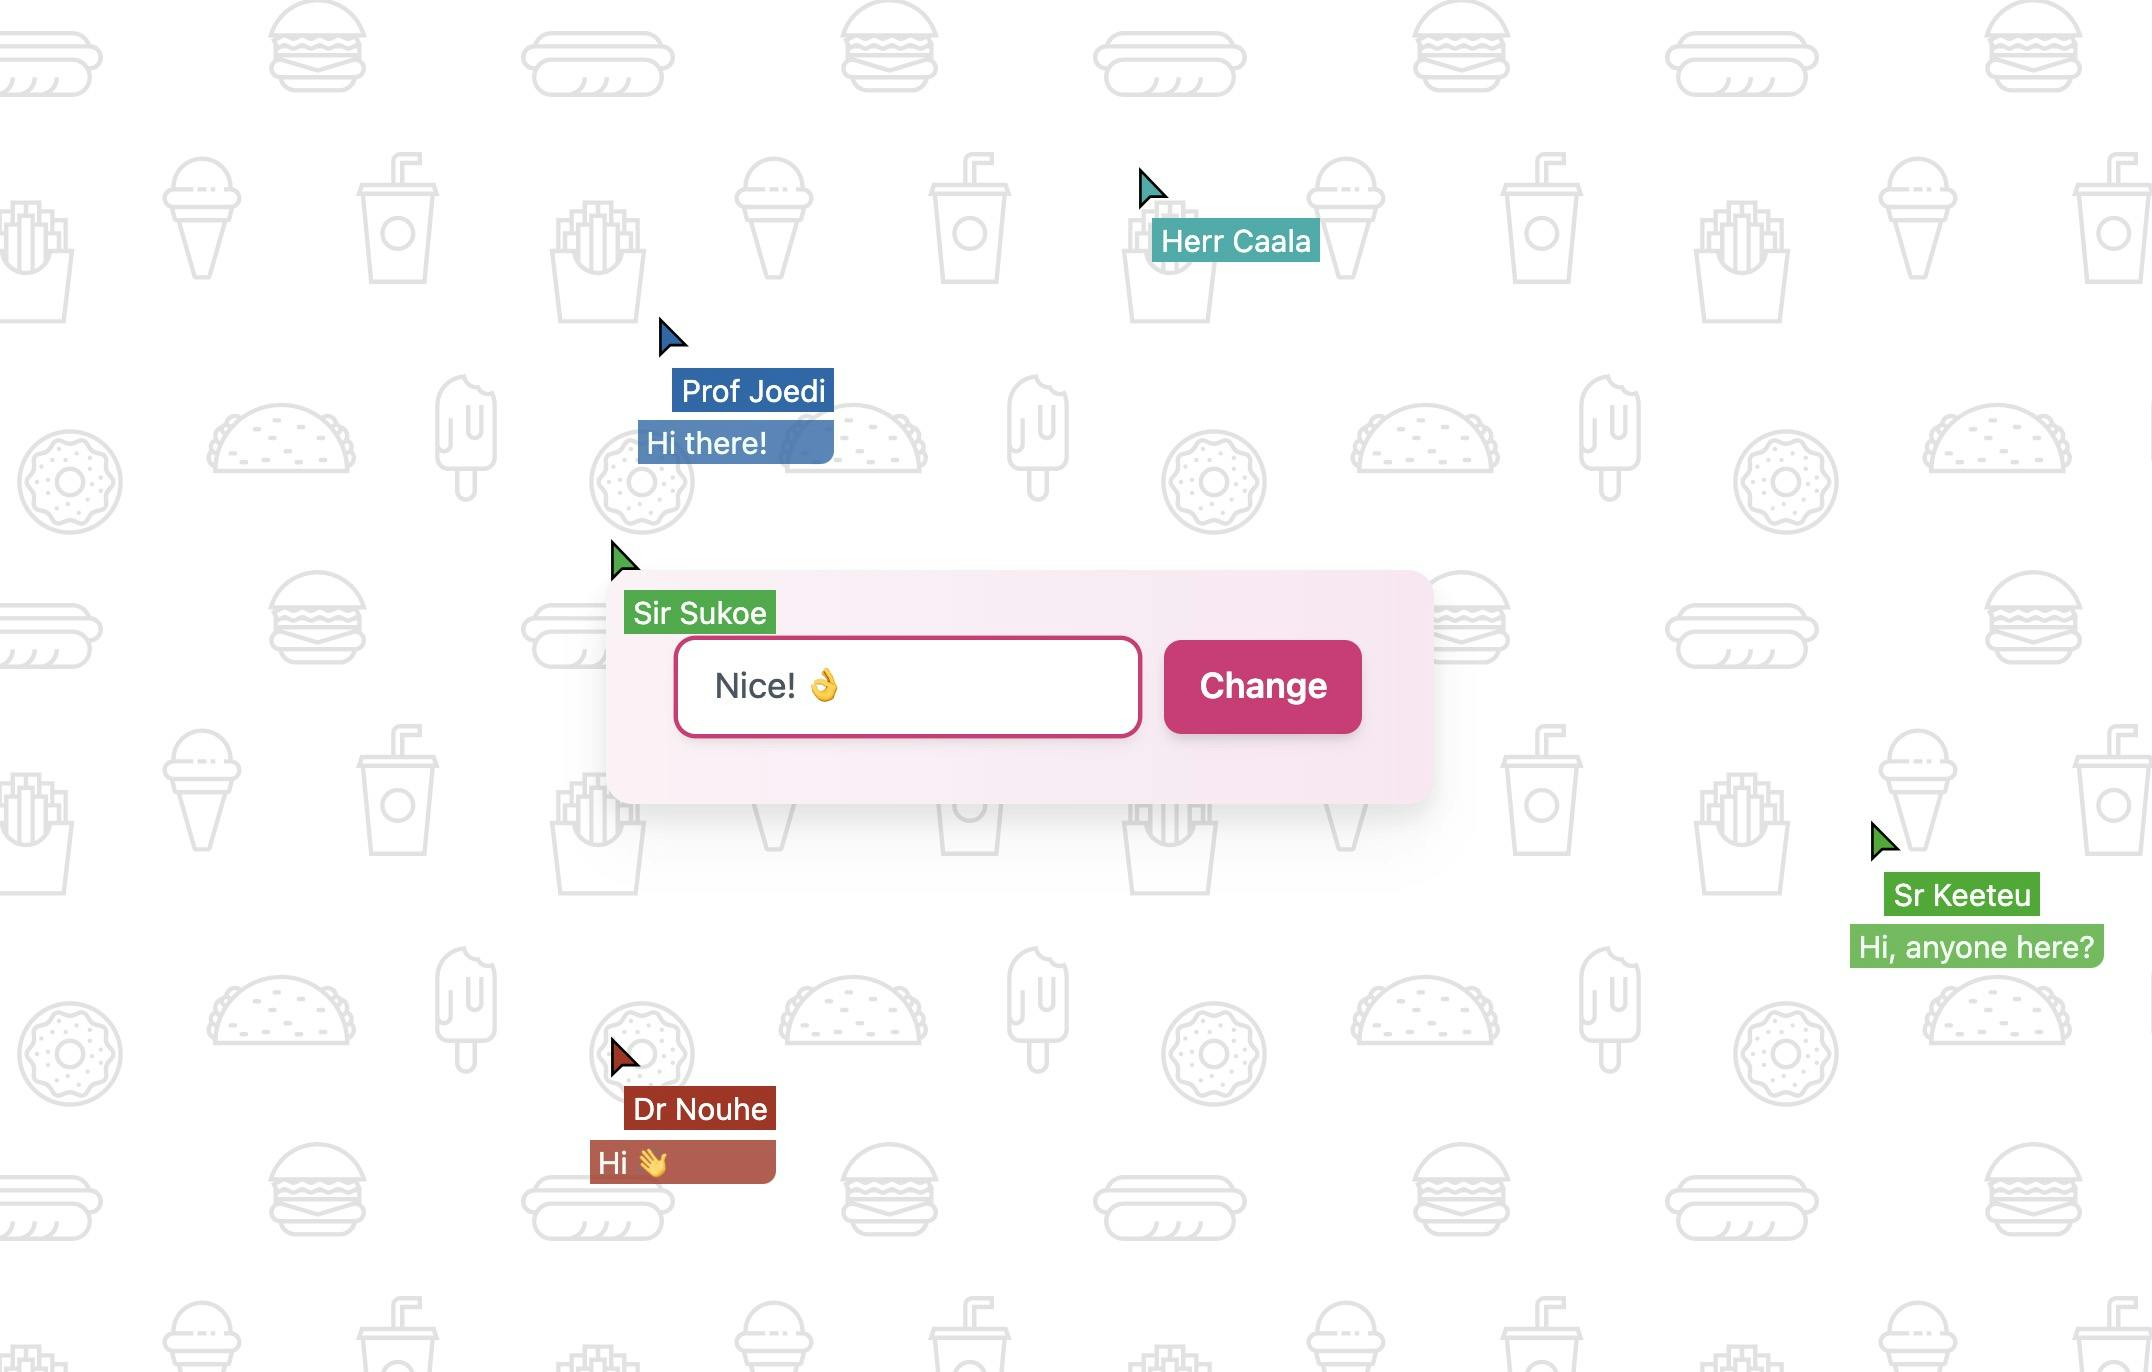
The feature works like this: when users visit the website, they're automatically added to a channel, get assigned a user name (with a corresponding color) and can send messages to other users using the input field. The result of this tutorial will look like this:

Getting started
Create a new Phoenix project using the command line. We only need the bare minimum to get started, so we'll not add Ecto, LiveView or Mailer.1
mix phx.new phoenix_cursors --no-ecto --no-dashboard --no-live --no-mailer
I'll be using Tailwind CSS for styling and you can quickly add that to the project using the official installer. You can read about the steps to follow in my earlier tutorial. All the changes I made to get Tailwind to work are also in this commit.
I've also added a nice background and some basic HTML. Replace the contents of the template lib/phoenix_cursors_web/templates/page/index.html.heex with the following:
<section
  class="flex flex-col w-screen h-screen justify-center items-center text-center"
>
  <form
    id="msgform"
    class="rounded-xl bg-gradient-to-r to-pink-100 from-pink-50 p-8 drop-shadow-xl flex w-xs mx-auto space-x-3"
  >
    <input
      class="flex-1 appearance-none border border-transparent py-2 px-4 bg-white text-gray-600 placeholder-gray-400 shadow-md rounded-lg text-base focus:outline-none focus:ring-2 focus:ring-pink-600 focus:border-transparent"
      maxlength="30"
      aria-label="Your message"
      type="text"
      id="msg"
      name="msg"
      placeholder="Say something"
    />
    <input
      id="submit-msg"
      type="submit"
      class="flex-shrink-0 bg-pink-600 text-white text-base font-semibold py-2 px-4 rounded-lg shadow-md hover:bg-pink-700 focus:outline-none focus:ring-2 focus:ring-pink-500 focus:ring-offset-2 focus:ring-offset-pink-200"
      value="Change"
    />
  </form>
  <ul id="cursor-list" />
</section>
You can see the results so far by running:
mix phx.server
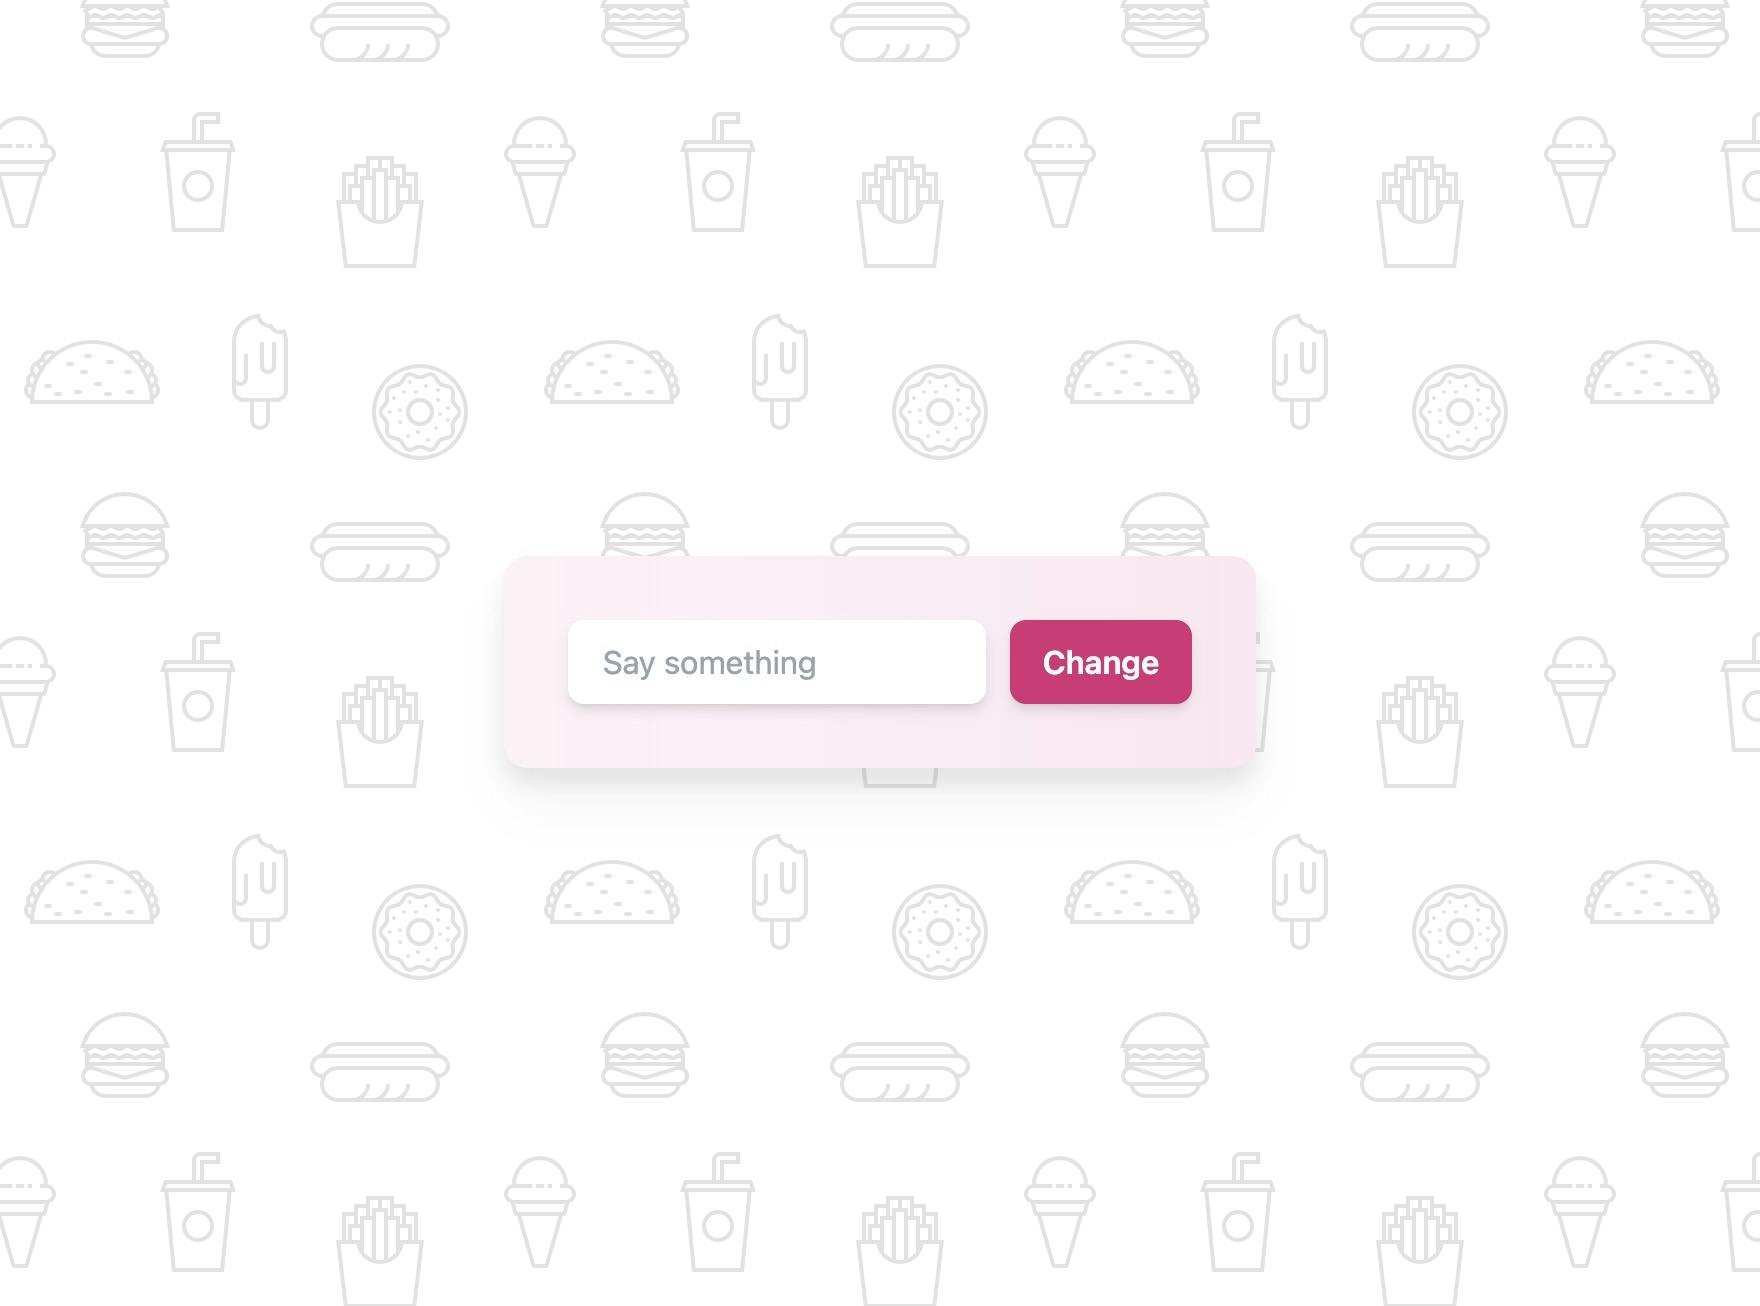
It should look like this:

Now that we have a working Phoenix project with Tailwind CSS, let's start building the application.
Note: you can also follow along with this tutorial on GitHub. Visit the list of commits here: https://github.com/vnglst/phoenix_cursors/commits/main
Tracking mouse movements
First, we'll add a channel that we can use to send mouse position updates to:
mix phx.gen.channel Cursor
Phoenix added some files to our repo. Make sure to follow any instructions that this command gives you and
add the socket handler to your lib/phoenix_cursors_web/endpoint.ex. I added it just above the socket for LiveView (disabled in my case):
  socket "/socket", PhoenixCursorsWeb.UserSocket,
    websocket: true,
    longpoll: false

  # socket "/live", Phoenix.LiveView.Socket, WebSocket: [connect_info: [session: @session_options]]
For the front-end integration, you need to import the user_socket.js in your assets/js/app.js file. Uncomment the following line:
// If you want to use Phoenix channels, run `mix help phx.gen.channel`
// to get started and then uncomment the line below.
import './user_socket.js';

// You can include dependencies in two ways.
//
To get a feeling for working with this channel (and sending updates to it) we'll start by tracking cursor movements server side. First, we need to start sending events from the client. In the file assets/js/user_socket.js add the following:
let channel = socket.channel('cursor:lobby', {});
channel
  .join()
  .receive('ok', (resp) => {
    console.log('Joined successfully', resp);
    document.addEventListener('mousemove', (e) => {
      const x = e.pageX / window.innerWidth;
      const y = e.pageY / window.innerHeight;
      channel.push('move', { x, y });
    });
  })
  .receive('error', (resp) => {
    console.log('Unable to join', resp);
  });

export default socket;
This listens for changes in the mouse cursor position and sends those as events to the Phoenix channel. Events for mouse coordinate changes are made independent of the viewport (between 0 and 1). This makes sure cursors stay within the viewport of all users (esp. those with smaller screens). To display them we need to scale them to the viewport.
Next step: handle the updates in Phoenix. We'll update the file lib/phoenix_cursors_web/channels/cursor_channel.ex for this:
defmodule PhoenixCursorsWeb.CursorChannel do
  use PhoenixCursorsWeb, :channel

  @impl true
  def handle_in("move", %{"x" => x, "y" => y}, socket) do
    broadcast(socket, "move", %{"x" => x, "y" => y})
    {:noreply, socket}
  end

  @impl true
  def join("cursor:lobby", payload, socket) do
  # ...etc
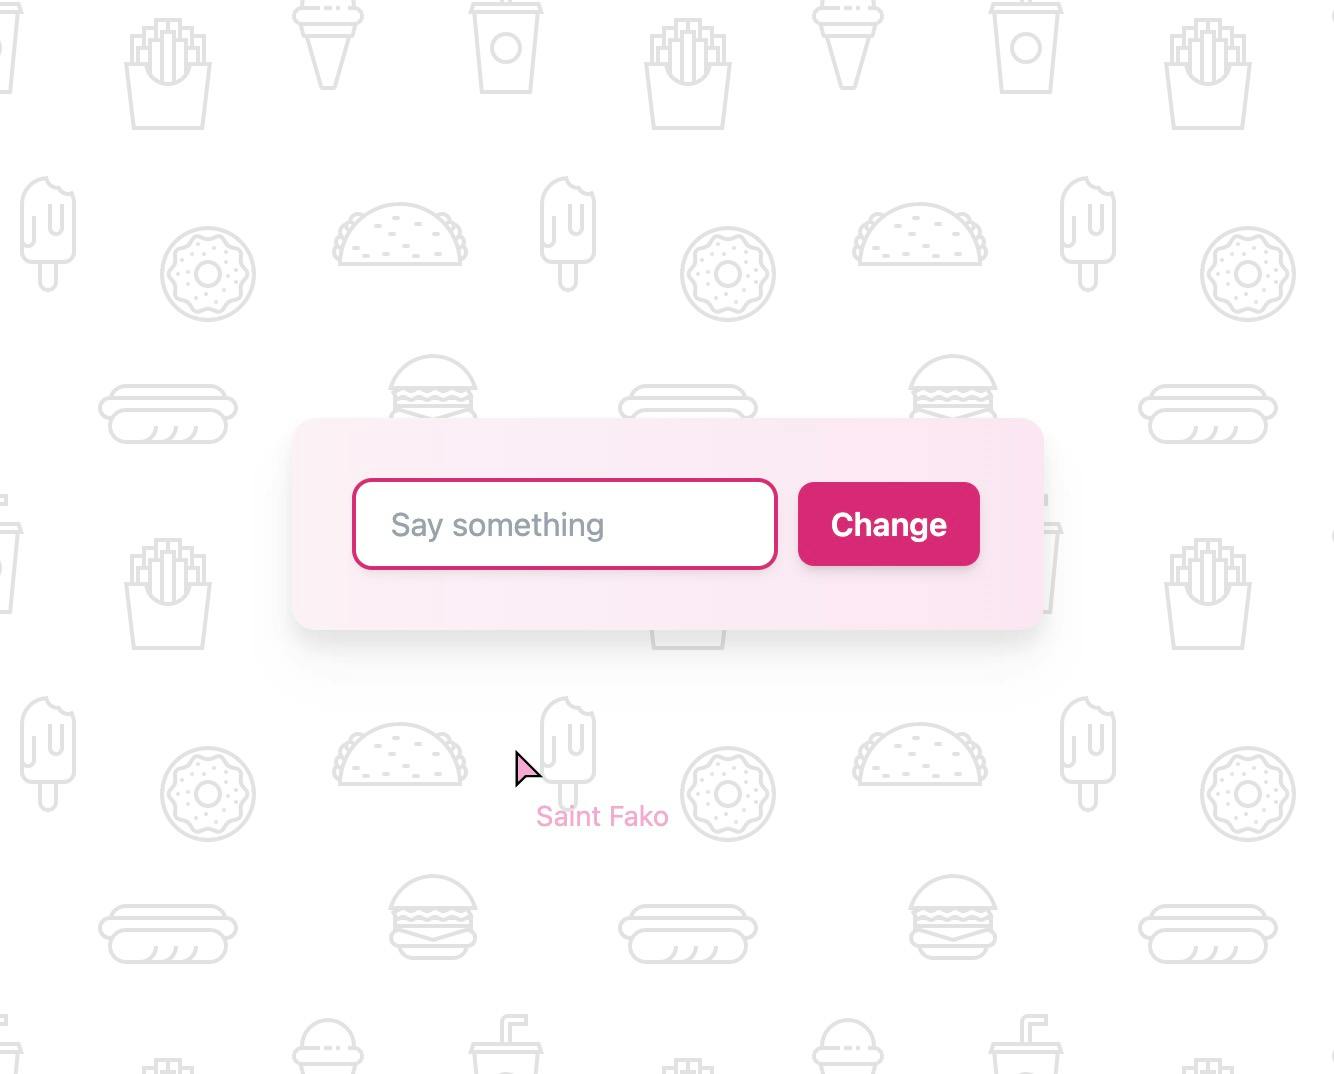
If you start the Phoenix server and move around with the mouse, you'll see the cursor position updates in the console. Yeah, it works!
Let's also display those updates on the page. For this, we'll need a bit of JavaScript.
We'll add a template function to the file user_socket.js:
function cursorTemplate({ x, y, name }) {
  const li = document.createElement('li');
  li.classList =
    'flex flex-col absolute pointer-events-none whitespace-nowrap overflow-hidden text-pink-300';
  li.style.left = x + 'px';
  li.style.top = y + 'px';

  li.innerHTML = `
    <svg
      version="1.1"
      width="25px"
      height="25px"
      xmlns="http://www.w3.org/2000/svg"
      xmlns:xlink="http://www.w3.org/1999/xlink"
      viewBox="0 0 21 21">
        <polygon
          fill="black"
          points="8.2,20.9 8.2,4.9 19.8,16.5 13,16.5 12.6,16.6" />
        <polygon
          fill="currentColor"
          points="9.2,7.3 9.2,18.5 12.2,15.6 12.6,15.5 17.4,15.5"
        />
    </svg>
    <span class="mt-1 ml-4 px-1 text-sm text-pink-300" />
  `;

  li.lastChild.textContent = name;

  return li;
}
And we listen for 'move' events on the channel:
let channel = socket.channel('cursor:lobby', {});
channel
  .join()
  .receive('ok', (resp) => {
    console.log('Joined successfully', resp);

    document.addEventListener('mousemove', (e) => {
      const x = e.pageX / window.innerWidth;
      const y = e.pageY / window.innerHeight;
      channel.push('move', { x, y });
    });

    channel.on('move', ({ x, y }) => {
      const ul = document.createElement('ul');
      const cursorLi = cursorTemplate({
        x: x * window.innerWidth,
        y: y * window.innerHeight,
        name: '???'
      });
      ul.appendChild(cursorLi);
      document.getElementById('cursor-list').innerHTML = ul.innerHTML;
    });
  })
  .receive('error', (resp) => {
    console.log('Unable to join', resp);
  });
If you open up two browser tabs next to each other you can see the cursor moving around. However, the moment you
leave the tab the cursor will disappear. To fix this we'll need a way to keep track if users are still present
in the channel. For this, we need the Presence feature.
Adding names
However, before we can track who's online, we need to add a way to identify users. Normally you would use some kind of authentication (signup/sign in) and a database for that, but I want to keep this tutorial as simple as possible. So instead I'll assign each user a unique name the moment they join the channel.
To generate unique names we'll add the following function to the project.
# lib/phoenix_cursors/names.ex
defmodule Cursor.Names do
  def generate do
    title = ~w(Sir Sr Prof Saint Ibn Lady Madam Mistress Herr Dr) |> Enum.random()
    name =
      [
        ~w(B C D F G H J K L M N P Q R S T V W X Z),
        ~w(o a i ij e ee u uu oo aj aa oe ou eu),
        ~w(b c d f g h k l m n p q r s t v w x z),
        ~w(o a i ij e ee u uu oo aj aa oe ou eu)
      ]
      |> Enum.map(fn l -> Enum.random(l) end)
      |> Enum.join()

    "#{title} #{name}"
  end
end
We'll generate this name on the server and send a signed token containing the name to the client. We sign it to make sure users can't tamper with it. The idea is that this prevents users from changing their name to someone else's.
In page_controller.ex add the following:
defmodule PhoenixCursorsWeb.PageController do
  use PhoenixCursorsWeb, :controller

  def index(conn, _params) do
    render(conn, "index.html",
      user_token: Phoenix.Token.sign(PhoenixCursorsWeb.Endpoint, "user socket", Cursor.Names.generate())
    )
  end
end
We'll store the userToken in sessionStorage on the client. Add the following line in root.html.heex:
    <!-- ... -->
    <%= live_title_tag assigns[:page_title] || "Cursors", suffix: " · Phoenix Framework" %>
    <link phx-track-static rel="stylesheet" href={Routes.static_path(@conn, "/assets/app.css")}/>
    <script>sessionStorage.userToken = sessionStorage.userToken || "<%= assigns[:user_token] %>"</script>
    <script defer phx-track-static type="text/javascript" src={Routes.static_path(@conn, "/assets/app.js")}></script>
  </head>
  <!-- ... -->
In user_socket.js we'll update the code that initializes the socket to use the newly generated userToken:
let socket = new Socket('/socket', {
  params: { token: sessionStorage.userToken }
});
When a user connects to the socket we can verify the authenticity by checking the token. Once
we've verified that a token is valid, we read the user name from it and assign that name
to the socket connection. This is done server side in the file user_socket.ex. Replace the
existing connect function with the following:
  def connect(%{"token" => token}, socket, _connect_info) do
    # max_age: 1209600 is equivalent to two weeks in seconds
    case Phoenix.Token.verify(socket, "user socket", token, max_age: 1_209_600) do
      {:ok, user_id} ->
        {:ok, assign(socket, :current_user, user_id)}

      {:error, _reason} ->
        :error
    end
  end
Now we know who's updating his or her cursor position and we can add this information to the
move event we're broadcasting to everyone in the channel. Update in cursor_channel:
  def handle_in("move", %{"x" => x, "y" => y}, socket) do
    name = socket.assigns.current_user
    broadcast(socket, "move", %{"x" => x, "y" => y, "name" => name})
    {:noreply, socket}
  end
And finally in user_socket.js:
  channel.on("move", ({ x, y, name }) => {
    const ul = document.createElement("ul");
    const cursorLi = cursorTemplate({
      x: x * window.innerWidth,
      y: y * window.innerHeight,
      name,
    });
Start your server and visit http://localhost:4000/ in your browser. Your cursor should
now have a name attached to it!

Tracking who's online
Now that we're able to identify users, we're ready to track their online presence. This is a feature that Phoenix offers out of the box! Use the generator to get started:
mix phx.gen.presence
Follow the instructions that are displayed after running this command by adding the new module to your supervision tree
in lib/phoenix_cursors/application.ex:
  def start(_type, _args) do
    children = [
      # Start the Telemetry supervisor
      PhoenixCursorsWeb.Telemetry,
      # Start the PubSub system
      {Phoenix.PubSub, name: PhoenixCursors.PubSub},
      # Start the Endpoint (http/https)
      PhoenixCursorsWeb.Endpoint,
      # Start a worker by calling: PhoenixCursors.Worker.start_link(arg)
      # {PhoenixCursors.Worker, arg}
      PhoenixCursorsWeb.Presence
    ]

    # See https://hexdocs.pm/elixir/Supervisor.html
    # for other strategies and supported options
    opts = [strategy: :one_for_one, name: PhoenixCursors.Supervisor]
    Supervisor.start_link(children, opts)
  end
In user_socket.js we're going to replace the update logic for the cursors. Instead of rendering user cursors based on the move event, we're going to render a list of users that are currently online/present.
import { Socket, Presence } from 'phoenix';

let socket = new Socket('/socket', {
  params: { token: sessionStorage.userToken }
});

socket.connect();

channel
  .join()
  .receive('ok', (resp) => {
    console.log('Joined successfully', resp);
    document.addEventListener('mousemove', (e) => {
      const x = e.pageX / window.innerWidth;
      const y = e.pageY / window.innerHeight;
      channel.push('move', { x, y });
    });
    // remove the code that updates cursor positions on the move event
  })
  .receive('error', (resp) => {
    console.log('Unable to join', resp);
  });

const presence = new Presence(channel);

presence.onSync(() => {
  const ul = document.createElement('ul');

  presence.list((name, { metas: [firstDevice] }) => {
    const { x, y } = firstDevice;
    const cursorLi = cursorTemplate({
      name,
      x: x * window.innerWidth,
      y: y * window.innerHeight
    });
    ul.appendChild(cursorLi);
  });

  document.getElementById('cursor-list').innerHTML = ul.innerHTML;
});
After users join the channel we set up their presence in the channel. When a user sends a move event, we update the Presence state. Update cursor_channel to the following:
defmodule PhoenixCursorsWeb.CursorChannel do
  alias PhoenixCursorsWeb.Presence
  use PhoenixCursorsWeb, :channel

  @impl true
  def join("cursor:lobby", _payload, socket) do
    send(self(), :after_join)
    {:ok, socket}
  end

  @impl true
  def handle_info(:after_join, socket) do
    {:ok, _} =
      Presence.track(socket, socket.assigns.current_user, %{
        online_at: inspect(System.system_time(:second))
      })

    push(socket, "presence_state", Presence.list(socket))
    {:noreply, socket}
  end

  @impl true
  def handle_in("move", %{"x" => x, "y" => y}, socket) do
    {:ok, _} =
      Presence.update(socket, socket.assigns.current_user, fn previousState ->
        Map.merge(
          previousState,
          %{
            online_at: inspect(System.system_time(:second)),
            x: x,
            y: y
          }
        )
      end)

    {:noreply, socket}
  end
Restart your server and visit http://localhost:4000/ in your browser. Every user should now have a live cursor that follows their mouse around.
Adding colors
To make the cursors more recognizable, we're going to add a unique color to each user. We'll generate a color based on the user name using the following Elixir code in the file lib/cursors/colors.ex:
defmodule PhoenixCursors.Colors do
  def getHSL(s) do
    hue = to_charlist(s) |> Enum.sum() |> rem(360)
    "hsl(#{hue}, 70%, 40%)"
  end
end
We assign this color to the user's presence in cursor_channel.ex:
  @impl true
  def handle_info(:after_join, socket) do
    {:ok, _} =
      Presence.track(socket, socket.assigns.current_user, %{
        online_at: inspect(System.system_time(:second)),
        color: PhoenixCursors.Colors.getHSL(socket.assigns.current_user)
      })

    push(socket, "presence_state", Presence.list(socket))
    {:noreply, socket}
  end

  @impl true
  def handle_in("move", %{"x" => x, "y" => y}, socket) do
    {:ok, _} =
      Presence.update(socket, socket.assigns.current_user, fn _previousState ->
        %{
          online_at: inspect(System.system_time(:second)),
          x: x,
          y: y,
          color: PhoenixCursors.Colors.getHSL(socket.assigns.current_user)
        }
      end)

    {:noreply, socket}
  end
And in the front end we use this color for rendering the list of user cursors. In user_socket.js:
presence.list((name, { metas: [firstDevice] }) => {
  const { x, y, color } = firstDevice;
  const cursorLi = cursorTemplate({
    name,
    x: x * window.innerWidth,
    y: y * window.innerHeight,
    color
  });
  ul.appendChild(cursorLi);
});
Update the function cursorTemplate by using the supplied color instead of pink-300:
function cursorTemplate({ x, y, name, color }) {
  const li = document.createElement('li');
  li.classList =
    'flex flex-col absolute pointer-events-none whitespace-nowrap overflow-hidden';
  li.style.left = x + 'px';
  li.style.top = y + 'px';
  li.style.color = color;

  li.innerHTML = `
    <svg
      version="1.1"
      width="25px"
      height="25px"
      xmlns="http://www.w3.org/2000/svg"
      xmlns:xlink="http://www.w3.org/1999/xlink"
      viewBox="0 0 21 21">
        <polygon
          fill="black"
          points="8.2,20.9 8.2,4.9 19.8,16.5 13,16.5 12.6,16.6" />
        <polygon
          fill="currentColor"
          points="9.2,7.3 9.2,18.5 12.2,15.6 12.6,15.5 17.4,15.5"
        />
    </svg>
    <span class="mt-1 ml-4 px-1 text-sm text-white" />
  `;

  li.lastChild.style.backgroundColor = color;
  li.lastChild.textContent = name;

  return li;
}
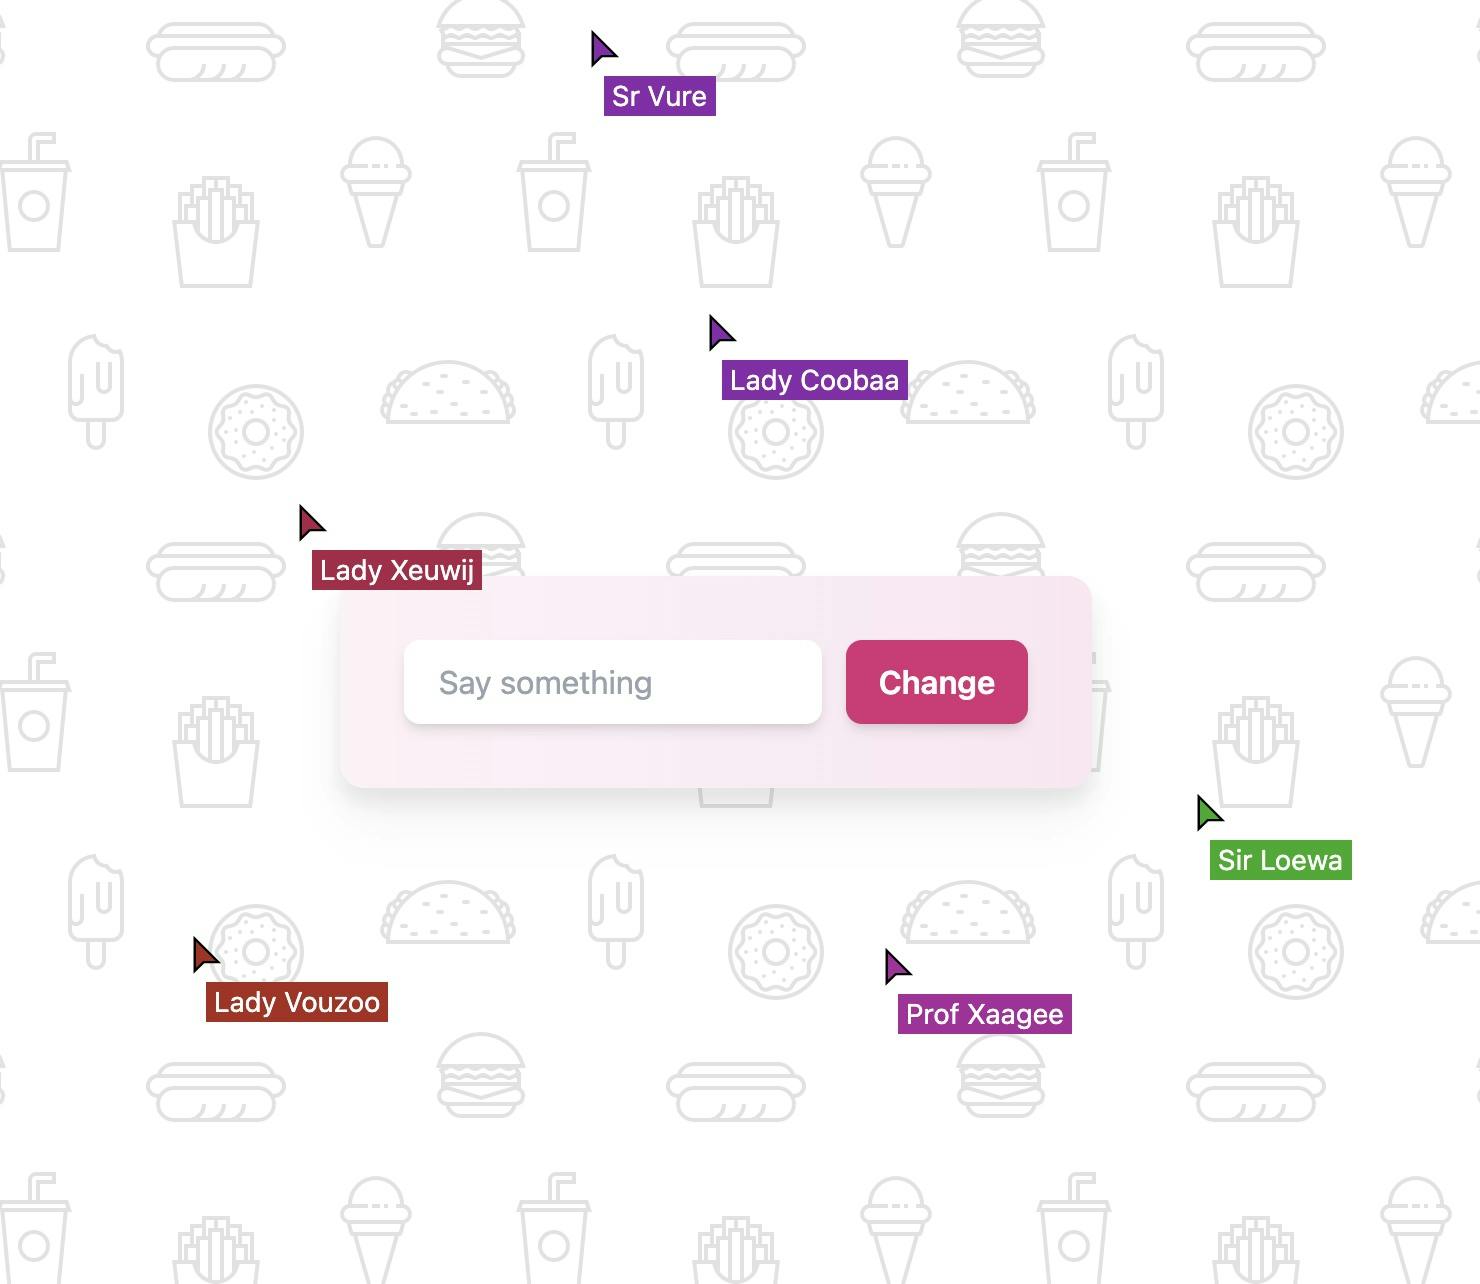
Restart the server et voilà! You should see a nicely colored cursor for every user present in the channel.

What's really cool about Phoenix Presence is that it automatically keeps track of who's online. You can verify this by opening a few browser tabs (to simulate multiple users) and then closing any one of them. That particular cursor will be removed from the screen!
Conclusion
This concludes my tutorial on Phoenix Channels and Presence. There's still one last piece of functionality missing: Letting users send messages using the input field displayed in the center. If you followed along in this tutorial you should be able to add this yourself. Give it a try! If you can't figure it out, take a look at my solution in the final commit on my repository. In the diff you'll find all the necessary code changes to get the chat functionality working.
Many thanks to Dmitri Don for giving this tutorial a try and reporting any mistakes and unclarities.
Footnotes
-
I'm aware that the live cursor feature would've been an excellent fit for Phoenix LiveView. However, I first wanted to get a better feeling for the Phoenix primitives Channels and Presence. In the future, I would like to build a similar functionality again with LiveView to see how that would reduce complexity. ↩